
Restoration process
Why My Cast Iron Electrolysis Tank Failed and How I Rebuilt It
My first reverse e-tank worked just well enough to reveal three weak points: coated lawnmower blades, copper wire inside the electrolyte, and connections that were never going to survive repeated use. Here is what failed and what I changed in the rebuild.
By Kerri Rundstrom · Rundstrom Restorations · 7 min read
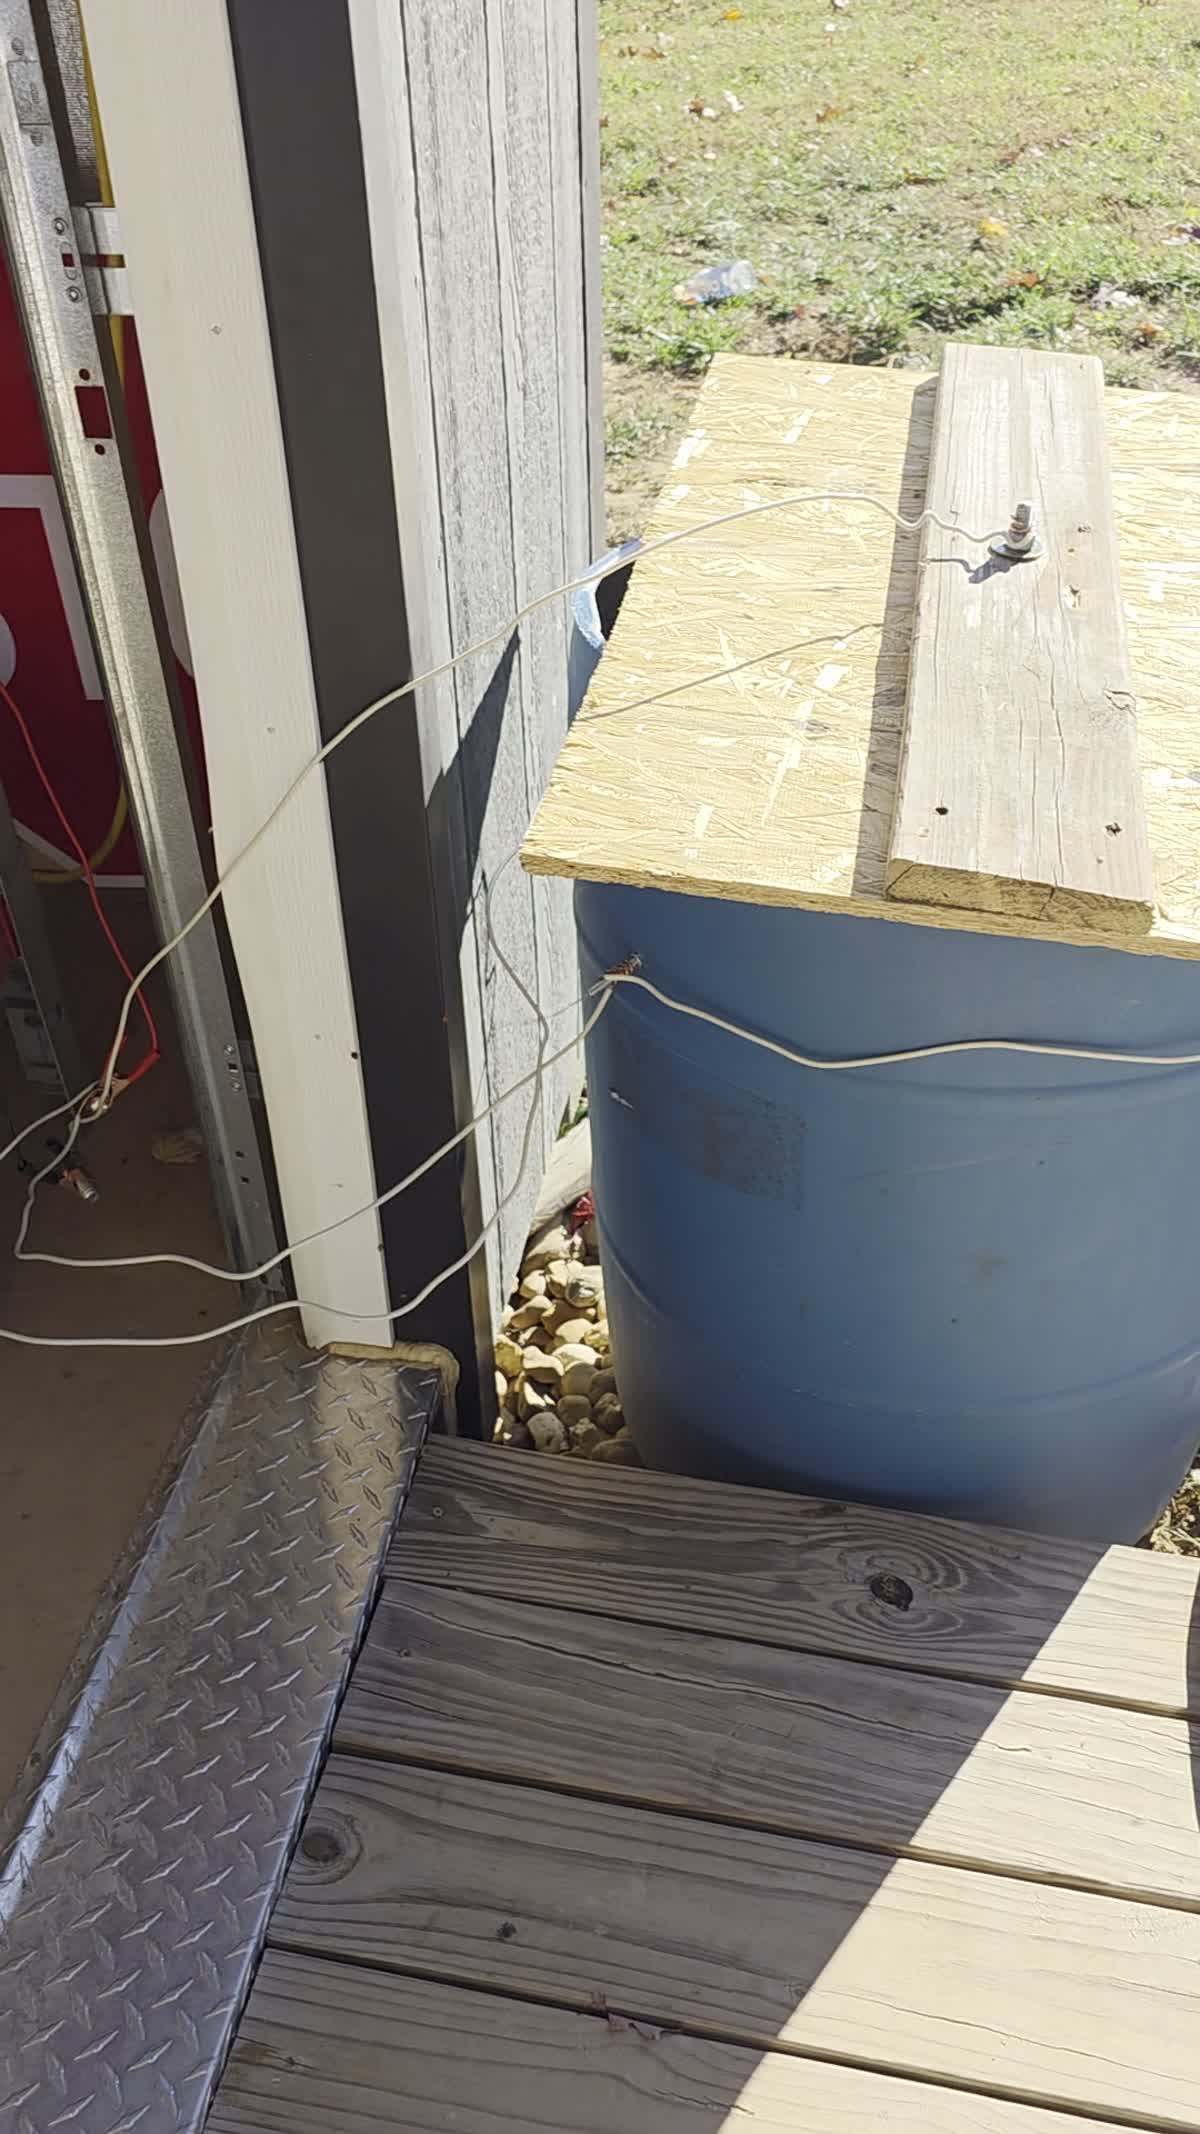
It worked, but it was not built to keep working
My first reverse electrolysis tank was not a total failure. It removed enough rust to prove the method. It also failed quickly enough to show me that a setup can pass its first test without being dependable.
I had suspended the sacrificial lawnmower blades with copper wire inside the tank. The blades still had their factory coating over most of the surface, so rust collected mainly on the narrow areas that had already been exposed by sharpening. Meanwhile, the copper wire was sitting in the electrolyte where it could corrode. It eventually deteriorated and fell apart, the internal connections failed, and the tank stopped functioning as a useful restoration tool.
At that point, another patch would only preserve a bad design. I emptied the tank, cleaned everything out, broke the setup down completely and rebuilt the same tank around the lessons the first version had taught me.
The coating on the blades was not a cosmetic problem
A sacrificial anode needs exposed conductive metal. The coating on the lawnmower blades insulated most of their surface from the electrolyte. The tank could react only where bare steel was available, which was mainly along the sharpened edges.
That explained the uneven buildup I could see on the blades. The reaction was not using the full face of each anode because most of that face was still sealed beneath the coating.
For the rebuild, I stripped both the front and back of the lawnmower blades completely to bare metal. That gave the tank the usable anode area I thought I had built the first time. It also created clean locations for the electrical connections instead of asking clamps and wire to conduct through paint, rust or residue.
The copper belonged outside the tank
The more serious design mistake was hanging copper wire inside the electrolyte. I had treated the wire as a convenient support and connection, but anything conductive placed in the solution becomes part of the electrochemical environment. The copper corroded until it could no longer hold the blades or maintain the circuit.
In the rebuilt tank, the copper wire and electrical junctions stay outside the electrolyte. The exposed steel anodes enter the working area, while the more vulnerable connections remain above and outside the solution where I can inspect, clean and replace them without draining the tank.
That is the change most likely to make this version last. Better access also makes troubleshooting simpler because I can see the connections instead of fishing through a dark tank to find the part that failed.
Why the charger had shown 0.0 amps
The cauldron project had already taught me that a clamp can look connected without making useful electrical contact. The charger remained at 0.0 amps until I sanded through the flaking seasoning on the cauldron and through the rust and coating at the sacrificial blade connection.
The circuit needs a clean metal path at both ends. On the cookware side, the negative connection must reach bare iron. On the sacrificial-steel side, the positive connection must reach bare steel. Paint, seasoning, heavy rust and loose scale can interrupt that path even when the clamps feel secure.
A zero reading is therefore a troubleshooting clue, not proof that the charger or the entire idea is broken. I now check polarity, clean-metal contact, secure connections and separation between the cookware and anodes before changing anything else.
What I changed in the rebuild
The rebuilt version is still one electrolysis tank powered by one charger. I am considering a second power supply in the future, but this project was about making the original tank reliable before duplicating anything.
The complete rebuild addressed the actual failure points instead of adding more equipment to them.
- Emptied and cleaned the original tank
- Removed the failed copper supports from inside the electrolyte
- Stripped both sides of the lawnmower blades completely to bare steel
- Routed the copper wire and electrical connections outside the solution
- Created accessible contact points that can be inspected and cleaned
- Kept the cookware and sacrificial blades separated inside the tank
- Reused the one charger already owned
The missing step-by-step footage has a very ordinary explanation
I normally document a restoration project as I go. This time, I have a narrated walkthrough of the completed rebuild instead of a careful clip of every step because I was trying to get the entire thing rebuilt during my kids' nap time.
There is a special kind of workshop efficiency that comes from knowing two small people may wake up at any moment. The camera lost. The e-tank won.
The finished walkthrough still shows the changes that matter: the stripped anodes, the external wire routing, the accessible connections and the single charger powering the rebuilt tank.
What I will watch during the next runs
A cleaner rebuild is still a working experiment until it survives repeated use. I will watch for even buildup across the bare blades, stable current, heat at the connections, loosening supports and any corrosion creeping toward the external wire junctions.
I will also disconnect power before touching or adjusting the tank, keep the setup outdoors with ventilation and keep ignition sources away. Electrolysis produces gas at the electrodes, including hydrogen. Wet electrical work deserves dry, protected connections and equipment used within its ratings.
I use plain steel rather than stainless steel for sacrificial anodes. Chromium-containing materials can create hazardous chromium compounds in electrochemical processes, and plain steel is readily available for this job.
If this rebuild remains stable, then a second charger may make sense as a capacity upgrade. First, the design has to earn the right to be duplicated.
The useful lesson was in the failure
The first tank did not fail because reverse electrolysis was the wrong method. It failed because I left most of the anode surface insulated and placed a vulnerable conductor inside the electrolyte.
Breaking it down was frustrating, but it gave me a much better system than repeatedly repairing the same weak points. That matters before customer-owned iron enters the workflow. A restoration service needs equipment that can be inspected, maintained and trusted, not a setup that happens to work once.
Now the tank is back in service with one charger, bare-steel anodes and its copper safely outside. The next pieces will tell me whether the rebuild solved the durability problem, and I will share what the tank looks like after real use.
Sources and further reading
Have this question about your own piece?
Send photographs and request a restoration assessment.
Over to you
What failed first in your homemade electrolysis setup, and what did you change when you rebuilt it? Tell us in the comments below.
From the workshop
Before you strip that skillet…
Get our free Cast-Iron Rescue Checklist: what to inspect, which problems need treatment, and when to stop before the pan pays for your enthusiasm. Sign up below for an immediate PDF download and future workshop updates. Email delivery is not active yet.
Join the conversation
Questions, comments, questionable skillets?
Ask a question or tell us what you're working on. Comments are reviewed before appearing. Please leave personal contact details out.
Loading comments…